
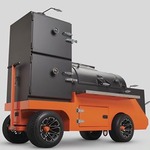
Hey my new 640 arrived and I got the dual door thermometer upgrade but am having trouble exactly how to mount them .... any help would be appreciated


- Joined: May 10th, 2014, 12:33 pm
- Posts: 576
- Location: Sitting Near a Yoder Smoker, Smelling Sweet Blue
Loosen the set screw in the stainless thermometer mount on the door, slide the thermometer in, then tighten the set screw.

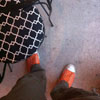
wow I'm a newb. Thanks for the fast reply and it worked like a charm....... starting the initial burn ![]()
- Joined: May 10th, 2014, 12:33 pm
- Posts: 576
- Location: Sitting Near a Yoder Smoker, Smelling Sweet Blue
You bet! You aren't the only one. Have fun with it!
Like many things in life...personal preference.
Being the grill is built like a tank, I wanted the Thermometers to be mounted the same way (IMO). I removed the stainless thermometer mounts, re-drilled the holes to allow the thermometers to be mounted directly into the door without the stainless mounts, drilling the hole just big enough to where the Thermometer threads would just have a little bit of grip into the door in addition to the backing nut and locking washer to hold them secure and in place. I did call Yoder and discussed this before doing so. I DID MAKE SURE they would clear the second shelf before doing this modification to "The Factory" set up of the door thermometers, as the probes will extend further into the grill, and made sure to use a high temp paint to protect the metal that just got drilled before installing them back on the door. Anyone choosing to do this modification will quickly realize the quality of metal that is used in the building of a Yoder Grill.

Yoder_Kirby wrote:Loosen the set screw in the stainless thermometer mount on the door, slide the thermometer in, then tighten the set screw.
I installed my Tru Temp that I ordered with my Yoder in the way you described but the Tru Temp was hopelessly off by 100deg my entire first cook. I'm going to be calling customer service on Monday. The set screw assembly is very large, and probably doesn't throw the temp rod far enough into the pit - though that doesn't sound right because 100deg is a massive difference. Either that or it's a faulty unit.


Scott wrote: I installed my Tru Temp that I ordered with my Yoder in the way you described but the Tru Temp was hopelessly off by 100deg my entire first cook. I'm going to be calling customer service on Monday. The set screw assembly is very large, and probably doesn't throw the temp rod far enough into the pit - though that doesn't sound right because 100deg is a massive difference. Either that or it's a faulty unit.
Depends on where your gauge is actually mounted. Mine is mounted to give me temps for the second shelf, which is significantly cooler than the lower shelf. The temp gauge may read accurately at its location but also be significantly off your set temp on the display, just because of where the temp gauge is located. The set temp should be close to temp readings at the lower grate, but not necessarily at all other locations. Not at all uncommon for my gauge to read 50-75 degrees different than set temp on the 2nd shelf. Honestly, I don't even use the gauge at this point. I find it interesting, but not terribly useful.
- Joined: May 10th, 2014, 12:33 pm
- Posts: 576
- Location: Sitting Near a Yoder Smoker, Smelling Sweet Blue
Scott wrote:Yoder_Kirby wrote:Loosen the set screw in the stainless thermometer mount on the door, slide the thermometer in, then tighten the set screw.
I installed my Tru Temp that I ordered with my Yoder in the way you described but the Tru Temp was hopelessly off by 100deg my entire first cook. I'm going to be calling customer service on Monday. The set screw assembly is very large, and probably doesn't throw the temp rod far enough into the pit - though that doesn't sound right because 100deg is a massive difference. Either that or it's a faulty unit.
It's normal for the door therms in a YS640 to be lower than lower grate temp. Sometimes 100* or more in my experience. As you do higher temp cooks, the difference may be larger than 100 degrees. There is nothing wrong with your pit or the thermometers.
Okay, thanks guys. Learning a lot for sure. Just a case of doing a little math I suppose for quite spot checks of the Tru Temp.

Scott wrote:Yoder_Kirby wrote:Loosen the set screw in the stainless thermometer mount on the door, slide the thermometer in, then tighten the set screw.
I installed my Tru Temp that I ordered with my Yoder in the way you described but the Tru Temp was hopelessly off by 100deg my entire first cook. I'm going to be calling customer service on Monday. The set screw assembly is very large, and probably doesn't throw the temp rod far enough into the pit - though that doesn't sound right because 100deg is a massive difference. Either that or it's a faulty unit.
After this update, any noticeable difference in performance?
Yoder YS640
Hi All'
Has anyone that has mounted the 2.5inch tel-tru directly through the door seen better results (accurate for the area)? I called tel-tru and discovered that the first 2" of the probe must be exposed to get accurate readings...my 2.5" probes only have about an inch exposed because the supplied mounting kit blocks the rest. I realize the upper shelf is cooler (not a bad thing) but If I have a probe is installed it should be accurate for the area installed. You can see a mark where the probe tip ends on any of their units 2.5" or 3"probe ...it is the last 2" and it should be exposed. BTW I love this grill and the versatility of all variables I can control! This is why I want accurate readings for the zone i am working with.

Hi Herb,
Thanks for the reply during a holiday weekend (not expected).
My question was more along the line of getting these $120 worth of probes and mounting kits to read accurate for the area they are mounted in. I understand they will not read accurate with the hopper temp set because of their location but they should read accurate with the upper grate location...the 2.5" long probes sold with yoder instillation kits do not read accurate for the upper grate location because half of the sensing area of the probe is not in the box . The upper grate is not 100 or 120 deg cooler than the lower. I have measured it with grate probes, probes inserted through door mounting kits and thermal imaginary (sent them to you guys in email, interesting good data).
You guys did an awesome job of building the grill! and I am satisfied with the grill. I have baked cookies on both areas upper and lower at the same time with 1 switch at the 5 min mark (measured the upper using probes to keep it even)!
Nice grill! but the engineering for the door probes/installation is lacking (talk with the probe manufacture). From what I understand the thermometers are now sold with the 3" probes. I asked for longer probes and was told there is no program to replace them.
So...to try and use the old probes with a more accurate upper grate representation I asked the
Question "has anyone installed the 2.5" probes without the installation kits (7/8 hole) with more accurate results?"
Once again I like the grill and the way it cooks...it is definitely possible to measure the upper grate temp but not sure these probes will do it? once I drill to 7/8" I will be stuck with limited mounting options.
The probes have a ring around the shaft which shows the amount of stem that needs to be exposed to get a proper reading on the gauge.
The gauge kits are designed to be owner installed, as the bulk of owners do not order them with the cookers. Because of this, the installation and mounting is as simple as drilling a normal sized hole, screwing on a nut and using a set screw to install the gauge.
There is also another trade off which must be considered, the required area in the cooker that can not be used for cooking, to allow the gauges to properly read temperatures, and to also not protrude, or come into direct contact with what is cooking. To get a proper reading, you must not have any food within 6 to 8 inches of the stem, which virtually eliminates the cooking surface of the upper grate on the YS480 and YS640. If you have anything that is cooking closer than the 6 to 8 inches, you will get a very skewed reading.
If you make the personal choice to drill the 7/8" hole(s) to mount the gauges using the Tel-Tru mounting kit, you will need to take the statements above into consideration, and, the gauges will still not show temperatures that match the controller, and will still be upwards of 50+ degrees from the lower grate temperature displayed on the controller because the cooker cooks from the bottom up.
The ring around the shaft is right at the mounting threads of the 2.5" tel-tru so almost half of the probe is covered by the yoder install kit (which is very nice btw). I will measure it up and see where the tip of the 2.5 inch probe will fall with the tel-tru mount and see if another option would be better. I just finished a 4 hr meatloaf smoke that everyone loved! The hopper temp probe was never more than 5 deg off for almost the entire cook!
I think there may be a misunderstanding...I am not trying to get the gauges to read/line up with the hopper temp, I am just trying to get it to read the lower temp of the upper grate area with a little accuracy.
My method to the madness is to avoid longer than normal cook times with all the variables involved: amount of food/stuff on lower grate, outside temperature, rain wind, etc... . I was motivated by a 8 lb brisket that was cooked at 225 hopper temp using the upper grate. I seem to get a bit more smoke up there and can put the tip next to the hotter stack side to try and get both ends of the brisket at the same time. The thing turned out awesome but the cook took 15 1/2 hrs (3hrs more than planned) and I was pushing the last 2 at 270 trying to get it done so it could rest before dinner and I needed the cooker for the chicken breast, potatoes and other goodies. Box was opened 4 times in the 15 hours...I made the mistake of using a larger aluminum water tray under the brisket to keep it moist over the night while I was sleeping (big heat sink) I ignored the door tel-tru gauges cause they have never been accurate. I think the upper grate temp was way low on that one...live and learn! This is why I am trying to get them reading accurate for the upper grate.
Again I will end on a compliment...Grill is awesome! almost like a stick burner with an autopilot? and way better than cooking turkey and pig in galvanized trash cans...good old days (no temp gauges there)
Thanks for monitoring! all good conversations to learn from...
I can see where you got the 100 degree temp difference now, assuming that the meat was more than 6" from each of the stems of the gauges so the readings weren't skewed.
With an empty cooker you can expect the upper shelf to be 20 to 25 degrees cooler than the lower grate. This equates to approximately 50 degrees difference at the location of the temp probes. Here is a baseline from my well used YS640 (2012): viewtopic.php?f=49&t=787
Now, lets put a pan in place (no water), now the difference on the top shelf is an additional 20 to 25 degrees cooler than the lower shelf, and an additional 25+ degrees cooler at the gauges. So at a set temperature of 225 degrees on the controller, you are now at a temperature of approximately 175 degrees on the upper grate, and the gauges will now be approximately 100+ degrees off.
Now lets put water in the pan (which BTW is of absolutely no use). Water temperature can never be more than the boiling point of the water at your specific altitude. This means that if the temperature was set to 225 on the controller, the absolute maximum temperature above the water would be 212 degrees, but, because of the pan and water act as a heat diffuser/heat sink, the water never really boils enough at a 225 set temperature on the controller, to reach this theoretical 212 degrees, so now you are now cooking on the upper shelf at somewhere below 175 degrees on the upper grate.
Thanks Herb! lots of good info and YS640 training...lol The water pan was an experiment not to be repeated. I have a temp probe idea...will test and report. Time to cook!
Was able to make a chambered probe mount for the tel-tru 2.5" probes using a 1/2 inch conduit connector (7/8 hole). It uncovers the entire probe to box heat but mounts it shallow in the box to keep it away from meat! initial tests at 300 deg show accurate within 10 deg to the upper grate in a empty grill:) this is a huge improvement...total cost $8 but you will need a 7/8 drill bit!
- upper grid right side
- IR_0389.jpg (46.25 KiB) Viewed 52531 times
- upper grid left side
- IR_0390.jpg (43.69 KiB) Viewed 52529 times
Caution for this or any other mod/cooking thing you may stick in your grill... never heat any galvanized metals near food! This fitting is cast potmetal. Some other fittings have a coating. Also caution for nonstick stuff too! A nonstick oven approved pan on the lower grate could go above the recommended temp...http://swac.web.unc.edu/thepipettepen/a ... flon-pans/
Do you have a mounting specs for the additional thermometer? What drill size and location on the YS640 do you use
- Disclaimer :
- The views and comments entered in these forums are personal and are not necessarily those of the management of this board.